We all know what a shark vacuum is, but what about shark vacuums? A shark vacuum is a type of upright cleaner that has been designed to remove dirt and debris from homes. It’s an efficient way to clean up your house, because it uses minimal power and cleans without the use of chemicals.
Shark vacuums are excellent for people who want to reduce their impact on the environment while still maintaining a clean home! In this article we will discuss what you should do when cleaning your shark vacuum.
Shark Vacuum Main Parts
The Shark Vacuum is what you should use when it comes to deep cleaning your home. It has certain features, for example:
- the brushroll works great with pet hair and other debris on carpets or rugs
- HEPA filters are what clean up allergens found in dust particles
- only little maintenance needs to be done over time.
The parts included into a Shark Vacuum consist of:
- the canister
- handle and hose
- motor head (main brushroll)
- dust cup
- hose.
Shark Vacuum Cleaning Process: What Should You Do?
You need to clean your Shark vacuum regularly so it functions properly, for example from pet hair or other debris. If this is not done on time over time dirt will accumulate even further inside which might cause health problems such as allergies or asthma attacks. In order to avoid these risks follow the steps below when vacuuming with a shark vacuum cleaner!
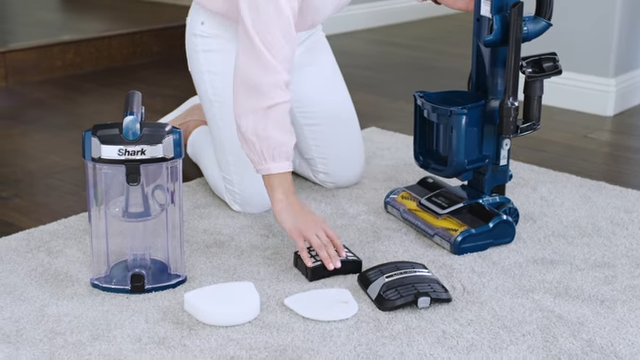
Step 1. Unplug and Disassemble
First of all you should unplug the shark vacuum cleaner. Then detach what’s attached to it, for example: dust cup; motor head (main brushroll); hose.
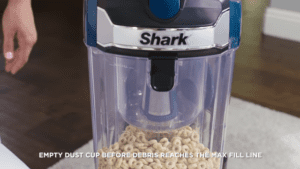
Step 2. Empty The Dust Cup
The second thing that needs to be done is emptying out whatever has been collected by opening up the bottom part where all the dirt ends up being stored.
Step 3. Wash The Water Canister
Wash the canister of your Shark with warm water and mild soap after each use, using only the recommended detergent for this purpose. Be sure to dry it thoroughly.
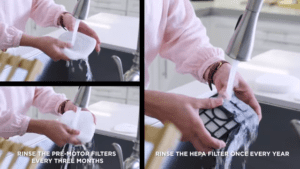
Step 4. Clean The Filters
After that what you need to do is clean the filters. To do so, take them out of their place, dunk them in soapy water and wash them thoroughly. It’s likely that the filters will look stained even after a good scrub. Then rinse under running water until they are no longer dirty anymore.
TIPS:
- Use white vinegar instead of soap or other chemicals! This will be good for your shark vacuum cleaner as well as it won’t leave any marks on it.
- Shark doesn’t recommend washing felt filters as they can get damaged easily. So, just tap them gently to loosen the dirt and wipe them clean.
Step 5. Clean The Rotating Brushroll
What you also need to do next is clean the rotating brush roll. To do so, what you have to do is take apart what attaches it with your vacuum cleaner and remove all hair or debris that might be stuck there. What’s important here is not to damage anything as small parts are easily lost
Use a soft brush to remove stubborn dirt or fill the brush with water and scrub it thoroughly. Allow the brush to air-dry for at least 24 hours before reattaching it.
Step 6. Clean The Hose
After that what you need to do is clean the hose. You can do it by simply sliding out what’s attached and washing all parts in warm, soapy water until they are completely free of debris.
Check the hose for clogs that may be restricting flow. Remove the hose from both ends and examine it carefully on all sides. Examine each end and the entire length of the hose very carefully. Let the mixture of baking soda and vinegar solution go and run warm water through the hose followed by cold water. It aids the cleaning of the hose as well as the removal of unpleasant odors.
TIP
You should also take a look at your vacuum cleaner bag or filter after finishing with the whole process; if there’s a lot of debris what needs to be done is changing it.
Step 7. Reassamble All Parts
Finally what you need to do is to reassemble all the parts back. To do so, what you have to do is follow in reverse order when taking them apart and make sure that everything’s attached properly before turning it on again.
In Conclusion
Thanks for reading our blog post on what you should do when cleaning your Shark Vacuum. You should always keep a shark vacuum cleaner clean if you want it to function well for months or even years! We hope that it gave you some tips to keep in mind the next time you are vacuuming!If you need help with anything related to vacuum cleaners tips and tricks, read the other posts on our blog or feel free to leave a comment below!