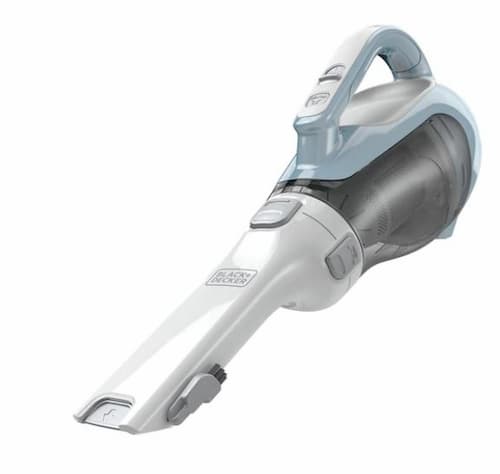
What do you know about the Black & Decker Dustbuster CHV1410L Battery Replacement?
Let’s speak about the 16-volt lithium-ion Black & Decker vacuum.
You can find a Black&Decker Dustbuster review here.

This is a fully charged unit, and the batteries lasted for about 18 months. You could end up having to replace this, and it would get pretty expensive, but you can also actually try to repair it by replacing a battery or the battery pack. We’re going to go ahead and test out the battery and try to repair it that way instead of having to buy a new one.
Black & Decker Dustbuster CHV1410L Battery Replacement: How To
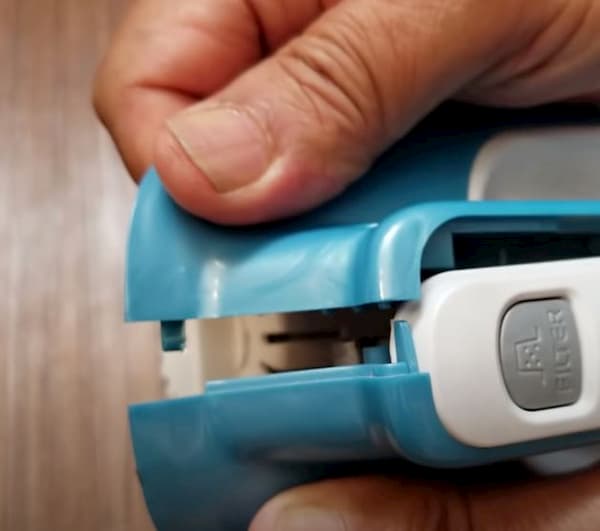
Step № 1

Remove those screws from this vacuum as well as the front part of the vacuum. Once you have all the screws removed, keep them together so you don’t lose any of them, and then split the vacuum down the center. You’re going to grab the two ends, and then it’s just going to pop off.
Step № 2
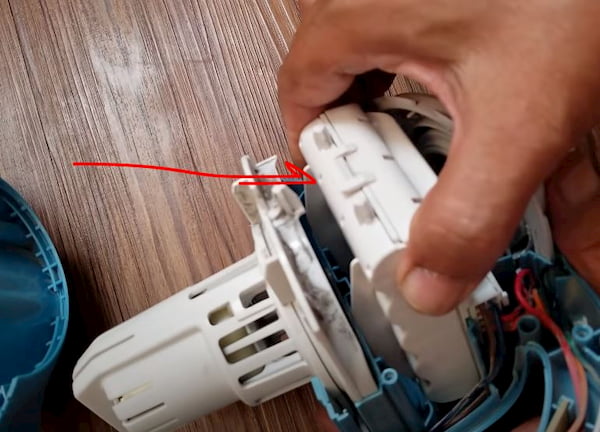
Little by little, go ahead and just pull at it, and then it will separate down the center, and you can see the battery pack right in the center. We’re going to remove that battery pack. There’s a little clip. You now have the different pieces of your vacuum over here, and then you have your battery pack, which is encased.
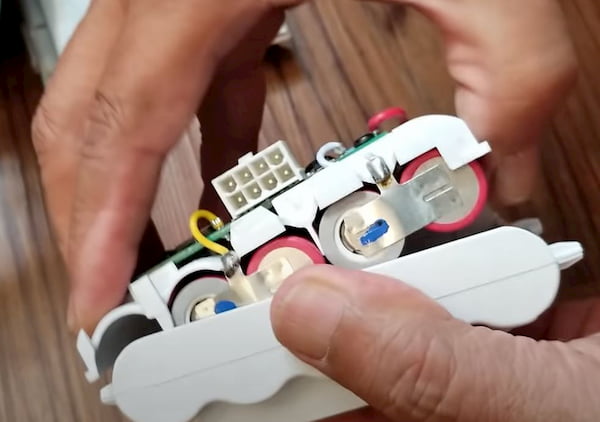
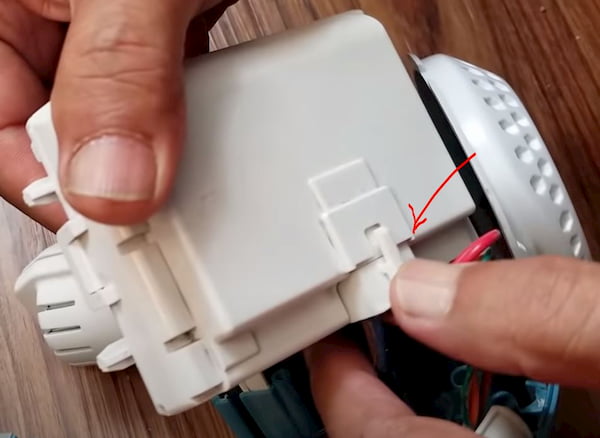
Step № 3
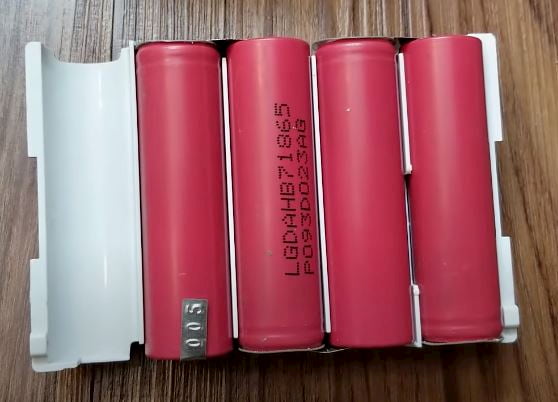
Right there, you have the four lithium-ion batteries that we’re going to test. This is where you can actually end up replacing all four of these, or you can test each individual battery and then just replace the one that’s causing you problems.
One of the ways you can test which one you want to replace is turning the vacuum on, and then quickly feel the four batteries. When I do that, these three are a cooler temperature, and this one is significantly warmer than the other three. I’m actually going to replace this battery and hope that replacing this one will actually lengthen the amount of time that the vacuum is able to run.
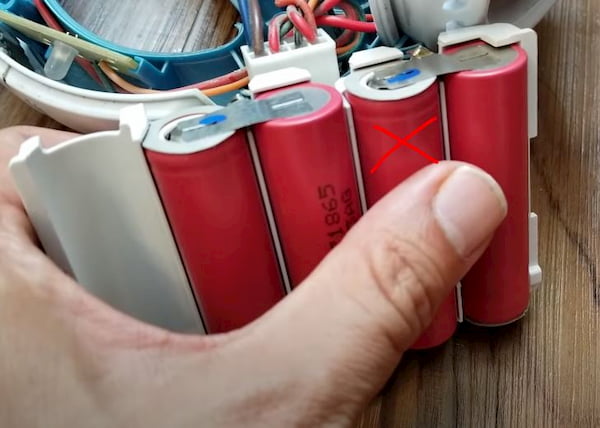
I’m also going to use the multimeter on each of the four batteries. The first one is 3.6. The second one is also 3.6. The third one, which I said is the one that I guess, will need to be repaired, notice it’s not 3.6, and then the last one, 3.6. Again the three are consistent, but the third one seems to be the one causing the issue.
You can buy the multimeter on Amazone
No products found.
Step № 4
To remove the battery, I just used a flat screwdriver and wedged it between the contact and the battery and split at the two ends, and then I was able to pull the battery out. Notice that the three are still connected to this device or to the unit or the pack, but the third one is popped out.
I bought a multi-pack of these replacement batteries. You’re going to get the 18650, 2,600 milliamps, 3.7-volt batteries.
- 8 pack of Energizer Power Plus Rechargeable AA Batteries
- Energizer AA batteries offer up to a 5 year battery life for a lasting rechargeable AA battery option
- Energizer rechargeable batteries save money when you use the AA rechargeable battery with an Energizer Battery Charger
On the multimeter, you see the 3.9, and then on the battery that I removed, you can see that it is less than 3.5. You see the replacement battery has been placed in the battery pack.
When I had the defective battery, it kept turning on and dying, turning on and dying repeatedly, but with that green battery that replaced it, you saw that it turned on, and it won’t turn off until you turn it off.
Step № 5
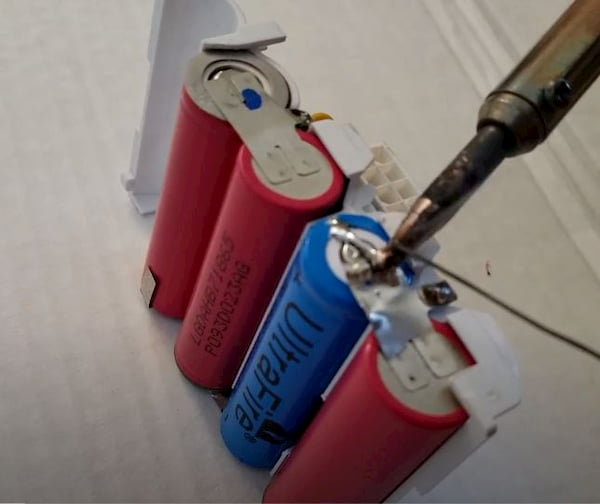
Now solder the ends of the battery to make sure it’s in there nice and tight. So I’m just showing you how to do that real quick. You need a solid wire, you need an iron to solder it, and then you just heat it up and make sure it’s attached. So then on the other end, the same thing, get your wire, heat it up. Just make sure that the contact is solid so that it doesn’t disconnect.
Step № 6
So let’s go ahead and plug it back into the vacuum. The new battery pack is back in the housing. You’re going to put everything back together. Grab your screws from earlier, because we’re going to go ahead and screw it back together. You’ll notice it’s coming out just a tad bit because it’s not an exact fit, but it’s close enough. So let’s put the top on to seal our battery pack. And it is now ready to go back in. So now all you’re doing is putting everything back together exactly the way it was.
If you need you can also get this upgraded C412 battery charger for your vacuum
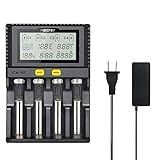
- ⚡【Fathers Day Gifts for Dad, 3A/Bay Fastest Charging】This upgraded C412 battery charger 3.0A/slot Charging only takes 50 minutes to charge 4pcs 3000mAh IMR battery to 85%.Please know 3A each bay...
- ⚡【Temperature Control】Made of PC Fire retardant material with excellent heat dissipation & electronic circuit design.When battery is reversed or short-circuited,it will show error symbol.If the...
- ⚡【Universal Battery Charger】The universal battery charger is fully compatible with: Li-ion / IMR / INR / ICR : 10340, 10350, 10440, 10500, 12340, 12500, 12650, 13450, 13500, 13650, 14350,...
Now you are able to replace the battery whenever this thing dies so that you can use it for as long as you want.
We have also prepared some reviews of the best vacuum cleaners